Merry Christmas 2011
I hope everyone had a wonderful Christmas and enjoyed time with family & friends. Another year down and another to welcome in!
This year I wanted to do a 'play' on a photo I'd seen on the Internet for our Christmas cards, the only problem was trying to get the kids & dog to cooperate :)
As you can see Bubby really did not want to cooperate...which is really not unusual when it comes to photos...one day when he's a grown up he's going to have to explain to his wife & kids why he has all these crazy faces in all the photos..and this was one of the 'better' ones, LOL. I love Bea's 'villian' grin, you know her she's all for playing it up. I wanted a vintage feel to the photos which I added during editing.
Bea & Boo
I decided to wrap up Mac and give it a go. He was NOT thrilled but a manged to snap a few quick photos.
Mr. B & I skipped out on the lights and just went with the photo before his work Christmas party

DIY Christmas Tree Decor
I've been wanting to make some Christmas Tree decor since Oct, I finally got around to it a few weeks ago...I know and I'm FINALLY blogging about it! In my defense I've been very busy during Christmas break trying to get ready for Christmas, Boo's birthday, and having the kids at home :)
Back to the tree decor...
These are the completed trees, below is the process:
The candlesticks, I actually bought 2 of the glass ones to stack but ended up not making a 3rd tree yet so maybe I'll add it next year or use them for another project...
I then bought 3 Styrofoam trees BUT found a crafty way to make the trees without the cones so I only used 1 of the cones, I got the large one for 40% off with coupon
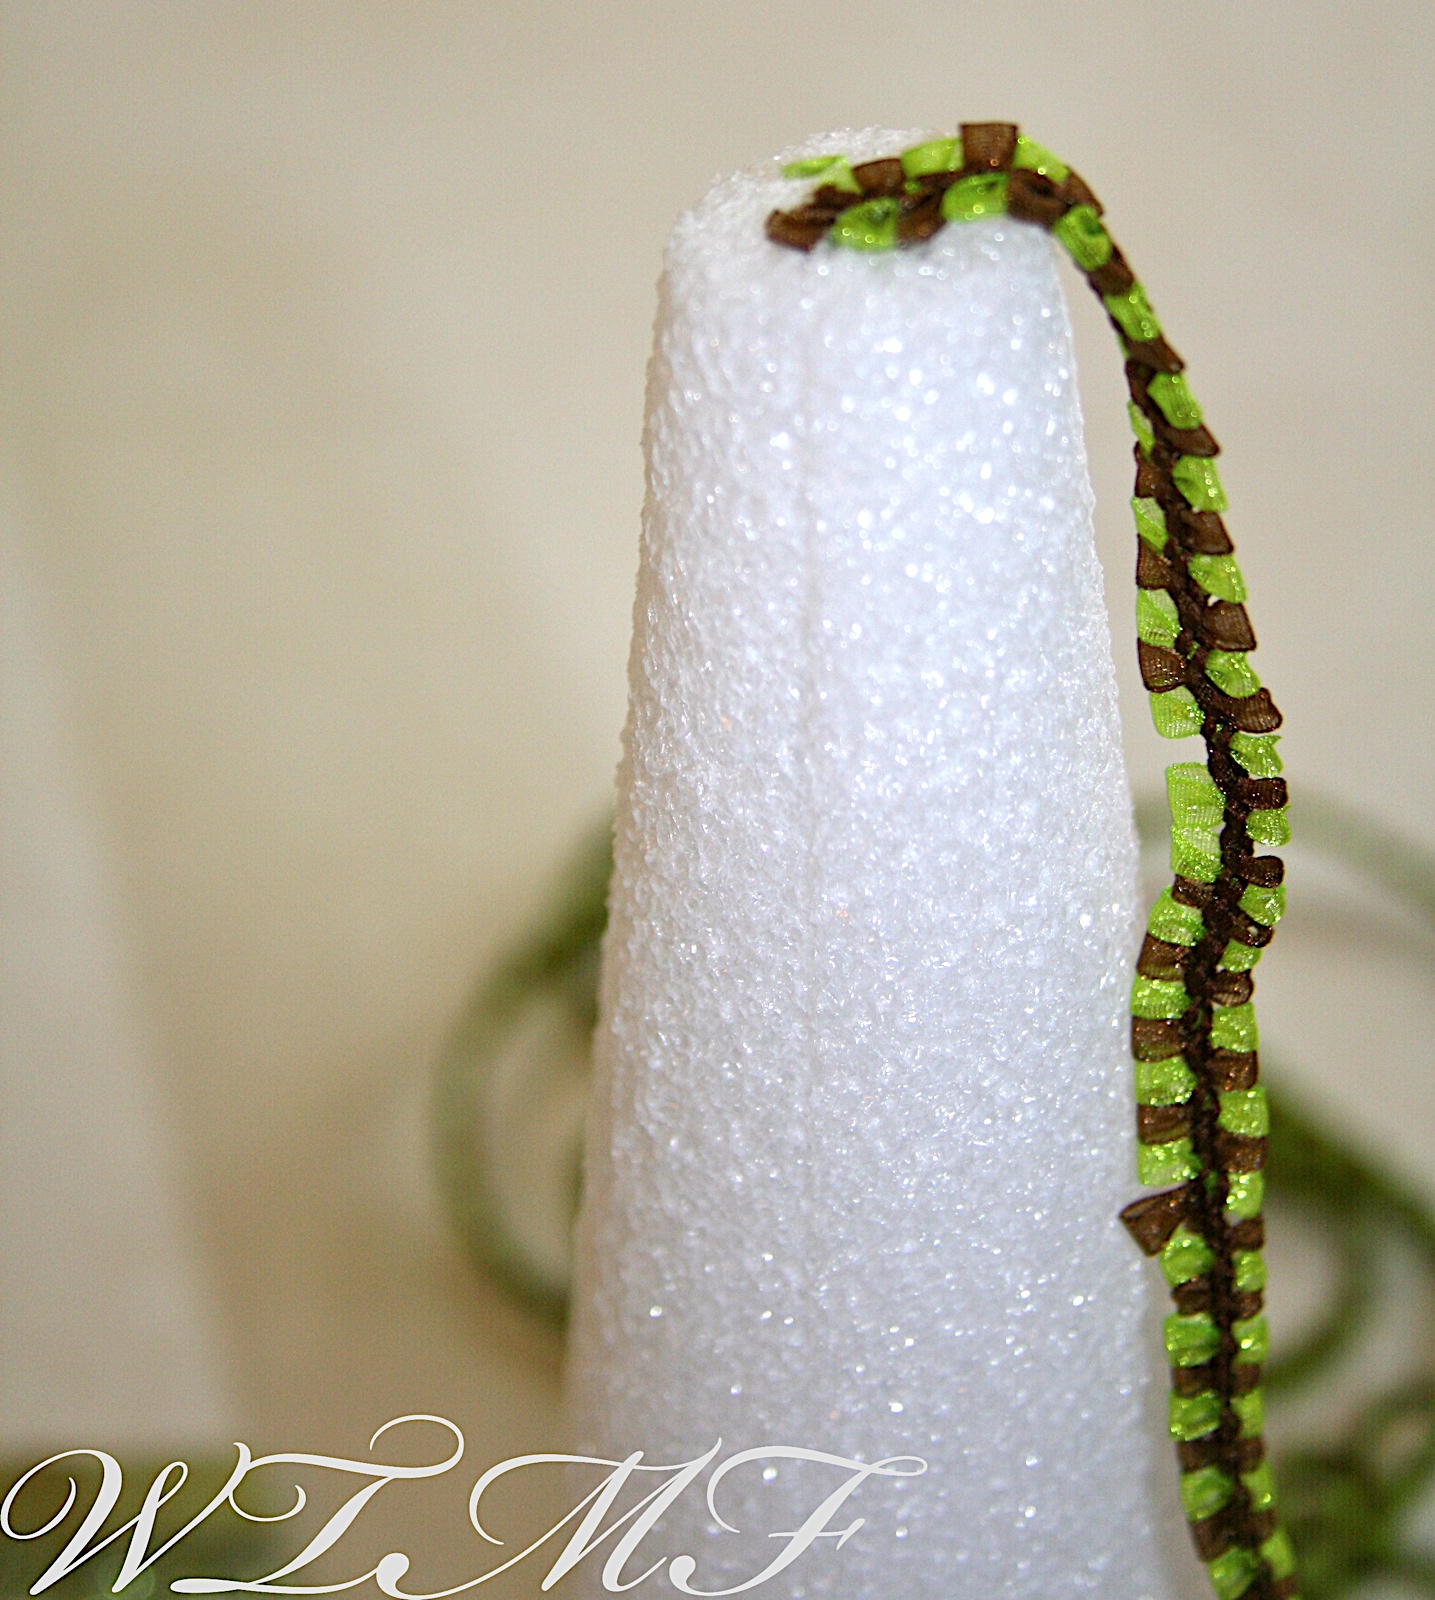
I started with the large tree, ribbon, and a hot glue gun (low heat) FYI I ended up needing 3 rolls of ribbon and only bought 1 each time so I had to stop and get more, next time I'll by extra to begin with!
Then I cut part of the Styrofoam out to fit the candlestick, I just used a steak knife...I know risky considering our family history with steak knives, but thankfully I did so without incident
I started by gluing the ribbon to the top center
Then curling it around as I went gluing it down. This is where the low heat glue gun comes in so you don't burn your fingers!
Here it is when I ran out of the first roll of ribbon
I then decided to glue on the decorative ribbon on the base, which I scored in the clearance section for 30 cents with another piece of ribbon!
All glued on
Close up of the bottom half all completed
Whole completed tree
Next I decided to try the cheaper route, I wrapped scrapbook paper around the Styrofoam cone and used the paper cone as my tree. That make it way cheaper than $3.99! I then cut some strips of green burlap that I scored on clearance and used the hot glue gun to glue on.
I glued a piece to the top
Then started cutting and wrapping the strips around and fraying the bottoms
After much trial and error I found the quickest process to be to hold up the above layer with a hair band (pony tail holder) and glue the next one underneath, fray it, then fold it up with the hair band and repeat.
Next I needed to figure out how to get it to stay on the candlestick since I was no longer using the cone. I quickly ate 2 Mott's Applesauce and 'recycled' the containers after a quick wash & dry. I accidentally tore the whole lid off the first one but I just hot glued it back on.
Then I shoved them both up in the scrapbook paper tree and set it on the candlestick, pretty nifty huh?!
The finalized trees with my Willow Tree nativity that I scored guess where...yep New In the Box from the thrift store! :)
Final cost:
Ribbon tree- candlestick $4 (which I only paid that much for because I really liked it, it was already 'finished' and I'll probably reuse for something else as well), ribbon $3 (50% off), Styrofoam cone $3, and base ribbon 15 cents for a total of $10.15. I could've done it for cheaper ($7.25) IF I'd figured out the scrapbook paper trick with this first tree as well.
Burlap tree- candlestick $1, spray paint $1 (because I still have a whole can for other projects), burlap $1, applesauce containers (free had at house), scrapbook paper 10 cents for total of $3.10
Spray Painting Candlesticks!
Once again I've been compelled to try a project from Pinterest, LOL! The problem was that in order to do the project I needed candlesticks...so I set out for the local thrift store and scored some. But I hit a snag when I could only find 2 that I liked and one that I could not use as it was. I called a friend and asked her to google if I could spray paint it...and sure enough I could! So here is my candlestick spray painting project:
I started off with this candlestick that I bought for $1 at the thrift store
When my friend was researching spray painting candlesticks she found that most people were recommending Krylon Fusion, so I went with the recommendations and bought a brown Krylon Fusion with a textured shimmer for a unique look.
I gave the ceramic candlestick a few coats and this is what I ended up with:
Viola! A brand new candlestick! Now every time I'm in thrift stores I look at candlesticks differently knowing that I can make them be whatever color I want them to be and those of us on Pinterest know there are tons of candlestick projects, LOL!
And what did I do with this and the others...that project tomorrow :)
Happy Birthday Mac
Happy Birthday Mac! Mac is 3 today!
He's so 'grown up' yet still cute as ever ;)
I have no idea why Boo was acting like he was sleeping...maybe he was hoping that if he played 'sleeping' I wouldn't take a photo, LOL!
And some Flashbacks:
Wow, look there is Boo play sleeping again...I see a theme going on here ;)
I'm amazed at how fast 3 years has gone by!
No Wonder They Call Him the Savior Book Review
No Wonder They Call Him the Savior: Experiancing the Truth of the Cross by Max Lucado
How can Jesus' darkest hour on the cross be mankind's highest hope? How can His death and suffering be the catalyst for hope? It was there upon that cross that eternity was changed and Jesus made the ultimate sacrifice, no wonder they call Him the Savior. Written in conversational style the chapters provide thought provoking information that remind us of the impact of the cross and what it truly means for mankind.
I really enjoyed this book, as I do all Max Lucado's books. I love his writing style, which makes the reading easy and yet provides great insight in to Jesus' journey and meaning of the cross. One of the chapters that I really enjoyed was The One Who Stayed. It talks about how out of the 12 disciples John was the only one to stay with Jesus. Max describes John as someone who not only thought of Jesus as a Savior but as a friend. And friends stick by each other even in undesirable circumstances, John was a living example of a true friend who made sure he was there to say a final good-bye to Jesus. I also loved that this book was so engaging it was hard to put down, I wanted to read a chapter a day but found myself not just being able to read only one chapter. Biblical truths are found in every chapter and relayed in a engaging format, I would recommend this book to others.
Booksneeze has provided me with a complimentary copy of this book for review, all opinions are my own.
Holiday Market
A few weeks ago I participated in a Holiday Market that my friend convinced me to do :) It ended up being lots of fun and I even made some $, which is always nice :)
Here are some of the items I made/sold:
These little ornaments when like hotcakes! I was surprised at how well they sold!
Notecards
4x6 prints
And the Family Name Houses :)
Wooden Photo Displays
I finished the rest of my photo displays! I do have to say they are quite fun and addicting!
For the flowers I just used ribbon and found some ribbon flower tutorials online
Good old twine
Ribbon with ribbon flower & button center
Photographing a Group....
when you are part of the group, LOL!!
I learned a few things about taking a group photo over Thanksgiving this year :)
We wanted to do a large group picture because it was the first time we've all been there together in a LONG time....what do I mean by long? We'll it's been at least 10 years since we've been back for Thanksgiving! Living overseas and deployments have prevented it until this year. Since I've been working on my photography Mr. B volunteered me, my camera, and tripod to take the photo! Nothing like trial by fire, huh?!
First groups are quite interesting to get 'posed' especially when dealing with family and the opinions of many ;) We did manage to get it figured out, so that's always a plus.
Second while the remote for the camera is a great idea, it apparently has a shorter range than needed. After getting a few photos with my back from trying to get close, press the remote, and run, I decided it was time to move to the self timer method. Sure I still had to run but I had much more time and was able to pop in before the photo when off.
Third I REALLY want a new lens, while I was able to get by with this one and the lighting I'd really be happier if I had a new lens for conditions like those.
And finally here are the photos:
All of us including PawPaw, 4 generations in this photo!
Grandparents with all the grand kids, I have no idea what Boo is looking at...there has always got to be one....LOL!!
All home at the same time!
Mr. B's sister and & family
Mr. B's older brother and his family
Our family, yup Bubby is being Bubby again. Also learned that Mr. B is quite cranky about taking photos when he's trying to get the turkey ready...we only got this one shot
Siblings!